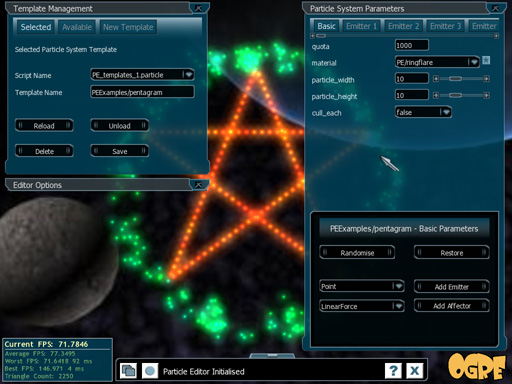
The Particle Editor when loaded with the default particle system - PEExamples/pentagram
Introduction
The OGRE Particle Editor is a real-time visual particle system editor. It is a tool that provides the ability to rapidly create OGRE particle system templates that can be used in any OGRE driven application. The effects are stored and loaded as templates via standard OGRE particle scripts (*.particle).Directory structure
Before we load up the particle editor lets take a look at the directory structure. You should have a bin and data directory.
Hint: Hovering the mouse cursor over certain buttons and text will show a tool tip. Tooltips will give some further explanation, and describe any keyboard shortcuts if any exist.
Template Management Window
The Template Management Window is where you can load, save, delete and generally manage all your particle templates. It has three tabs: Selected, Available and New Template.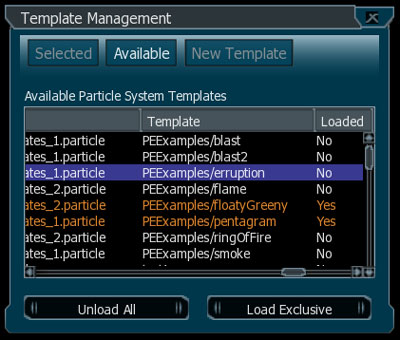
Particle System Parameters Window
This window is where you will do the bulk of your work when tweaking your creations. It is divided into two; the upper section contains the particle system components and parameters associated with a selected component, and the bottom section consists of a panel where you can perform certain actions on that component.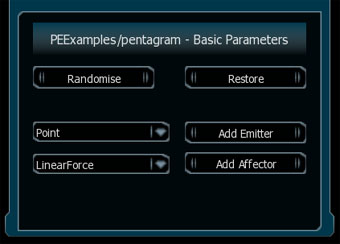
Editor Options Window
This window contains two tab panels that allow you to manually control the camera, and to change miscellaneous editor settings.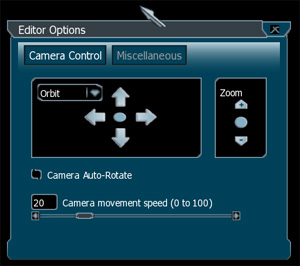
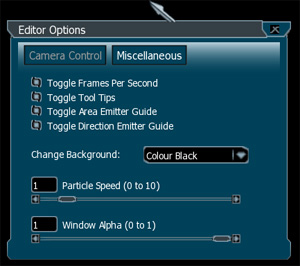
Hint: Moving and resetting the camera can be controlled by keyboard shortcuts. See the tooltips.
Status Bar
The status bar lives at the bottom of the editor screen. Certain actions (such as loading a particle system) will result in a text message been displayed in the status bar.![]() Windows button
Windows button
The windows button is useful for quickly hiding any visible editor windows. Clicking it again will
show all the windows that were hidden.
![]() Reset button
Reset button
Use the reset button to restore all the editor windows to their default values. It is possible to move,
collapse and close all of the editor windows, so this button will come in use when you need to find a
lost window. The window values that are restored are position, size, whether it's collapsed and also
the alpha transparency of the windows.
![]() Help button
Help button
Click on the help button to open the help window. The help window may hold some useful tips,
the keyboard shortcuts and also some basic information about the editor.
![]() Quit button
Quit button
Use this button to format your hard disk.
![]() Toggle bar button
Toggle bar button
The toggle bar button will hide or display the Status bar. If you click this button to hide the
Status Bar, the bar will be hidden and this button will slowly fade out of view. To get this button back
into view, move your mouse cursor over the last position of the button and click.
Hint: In addition to the Status Bar buttons to hide the editor windows, you can toggle the entire GUI from view by pressing the F1 key.
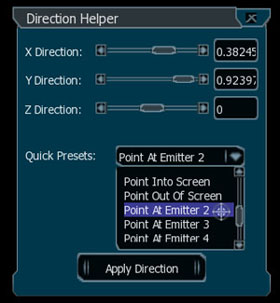
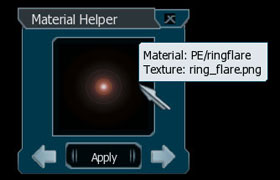
Additional Helper Windows
The editor has three different helper windows that can be accessed by clicking on the appropriate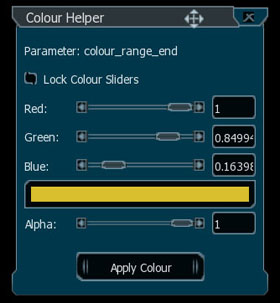
Keyboard Shortcuts
[ESC] - quitPerformance
Be warned, if you attempt to run the Particle Editor on certain "slower" hardware and older graphics cards, you may experience intermittent slow downs or just plain poor performance. There isn't a concrete dividing line dictating what minimum hardware is necessary to get acceptable performance, but the editor has been extensively tested on the following setups with the editor running with no noticeable performance hits:Authors / License / Thanks
Developed by mac (mac "AT" gamecat.de) and spannerman (spannerworx "AT" gmail.com).